Method of price calculation
Enectiva makes it easy to view financial statistics.
Enectiva determines costs in two ways:
- from the assigned price lists that have been created in the Price List Management and then assigned to individual entities
- from the attached invoices
Price lists
There are two levels of price list details
Basic price list with price per unit only
The price list is assigned a unit price, which determines the price per unit of energy consumed. For electricity it is 1kWh, for heat and cooling 1kWh, for water 1m3. The cost for a given period is determined as consumption * price per unit. Each price list is valid and the price in the price list is also valid. For example, they can have retail prices of CEZ and have different prices over time. For example, in 2013 they have a price of 3.5 CZK / kWh and in 2014 they have a price of 3.4 CZK / kWh. The entity or meter is then assigned only the price list for small CEZ customers. Importantly, it is based on the calculated consumption multiplied by the applicable price list. At the same time, Enectiva monitors the expiry of the price list and allows to re-assign the price list.
Advanced price list
It is an advanced pricing model that determines costs as a combination of consumption-dependent prices plus monthly lump sum payments according to the specified technical parameters of the entity to which it is assigned. It is an extension of the price per unit option when the cost consists of two items.
Price per unit * consumption + monthly lump sum payments.
Lump sum payments depend on the parameters of the entity, namely the size of the circuit breaker for a small customer and the size of the reserved capacity for a large customer. These lump sums are calculated automatically at the beginning of the new month and are based on the total number of days (minutes) per month.
The resulting formula is consumption * price per unit + lump sum payments = price per period.
In addition to basic energy unit prices (e.g., per kWh), additional components can be included, such as:
- Fixed monthly fees (e.g., administrative charges).
- Distribution fees (which may vary depending on the provider).
Created advanced price list there:
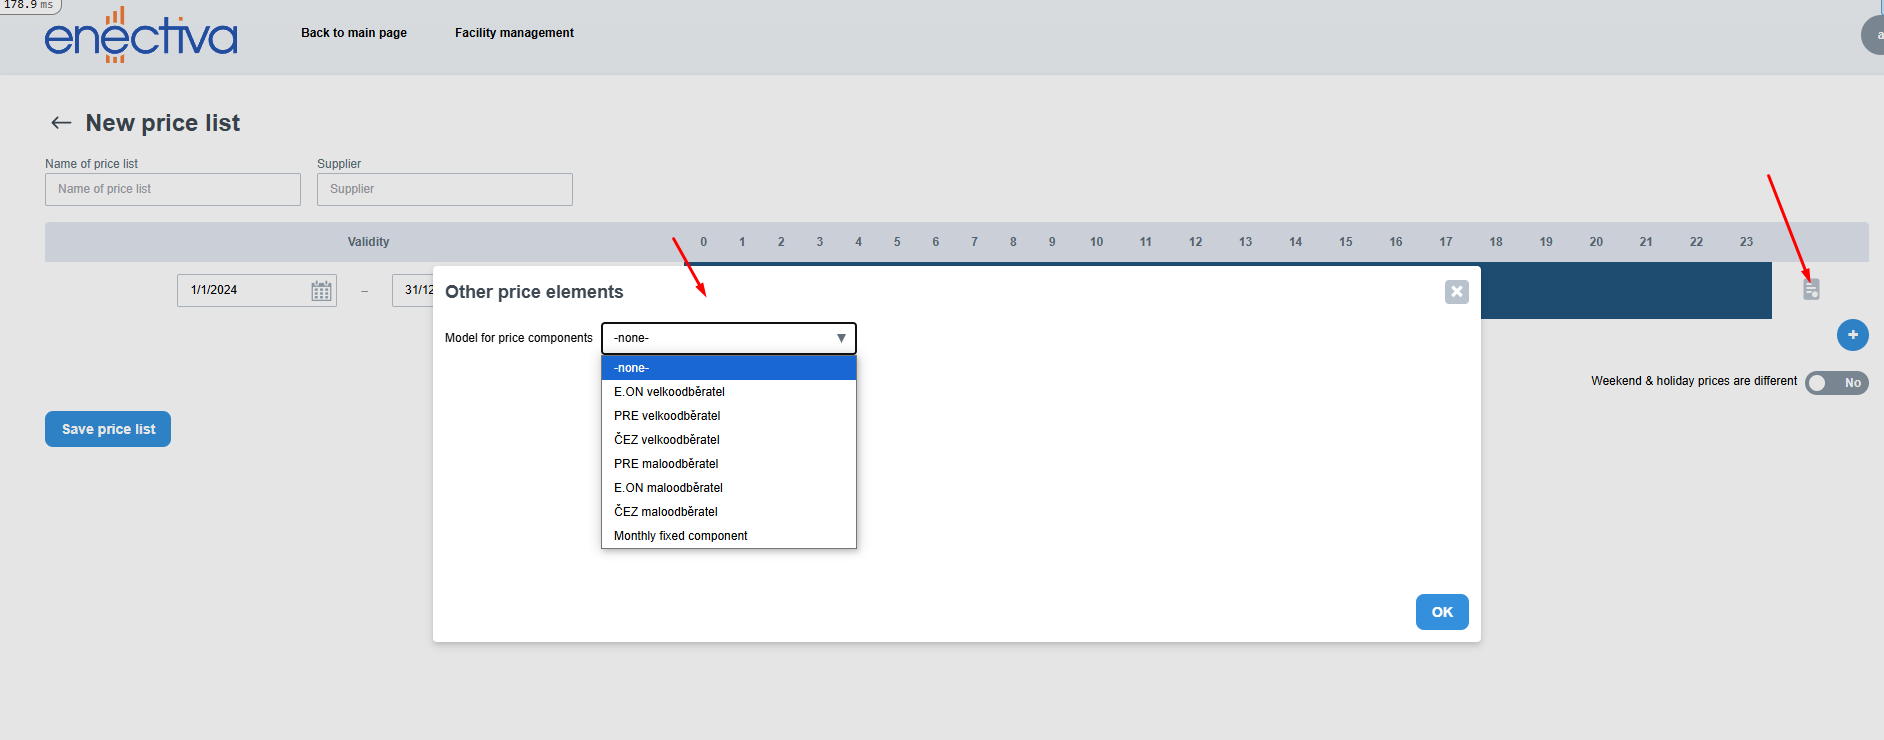
For advanced price lists, it is necessary to configure specific parameters for the associated meter:
- Main breaker rated current:
- The value in amperes (A) corresponding to the size of the main breaker.
- Used to determine the fixed capacity charge based on the provider's parameters.
- Number of main breaker phases:
- Specifies the number of phases (e.g., 1 or 3 phases), which affects distribution tariffs and fees.
- Distribution rate:
- Tariffs of the distribution company, which may vary by region, time of consumption (day/night), or specific conditions (e.g., low/high tariff).
- Reserved capacity (in MW):
- The maximum capacity in megawatts that the consumer has reserved under the contract.
- This value affects fixed charges for capacity reservation.
- Reserved wattage (in MW):
- Specifies the maximum power that can be supplied to the consumer.
- Used to calculate charges for overloading or exceeding reserved wattage.
Price list management
If you click on the Manage Pricing button at the bottom left under the entity tree ![]() , the following
table will open:
, the following
table will open:

This is an overview of all existing price lists you have ever created. There are several tabs: "everything, electricity,
gas and water". These correspond to the energies for which you can create price lists. It also depends on which energies
you have enabled for your account. The energy tabs allow you to "Create a new price list" ![]() - this button is
only available on specific energy tabs.
- this button is
only available on specific energy tabs.
Creating a price list
When you select a specific energy, the Create new price list button appears. If you click on it, you will see a similar window:
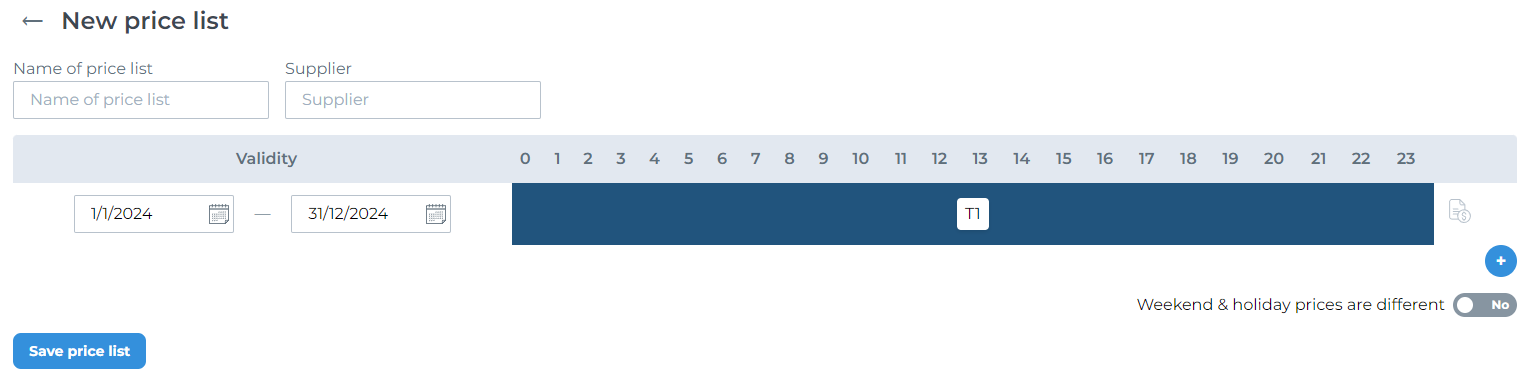
Most of the fields are self-explanatory. However, the main part is the timeline. First we have "Validity", this field
indicates for what date range the price list is valid, by default it is set to one year. This is followed by the
timeline for price tariffs (the dark blue line in the image with the "T1" symbol). After the line is a small
symbol![]() , which is a button to enable advanced price list features such as wholesale tariffs. The last button
plus symbol is used to add additional timelines that can be used to add validity sequences.
, which is a button to enable advanced price list features such as wholesale tariffs. The last button
plus symbol is used to add additional timelines that can be used to add validity sequences.
Adjustment of tariff validity
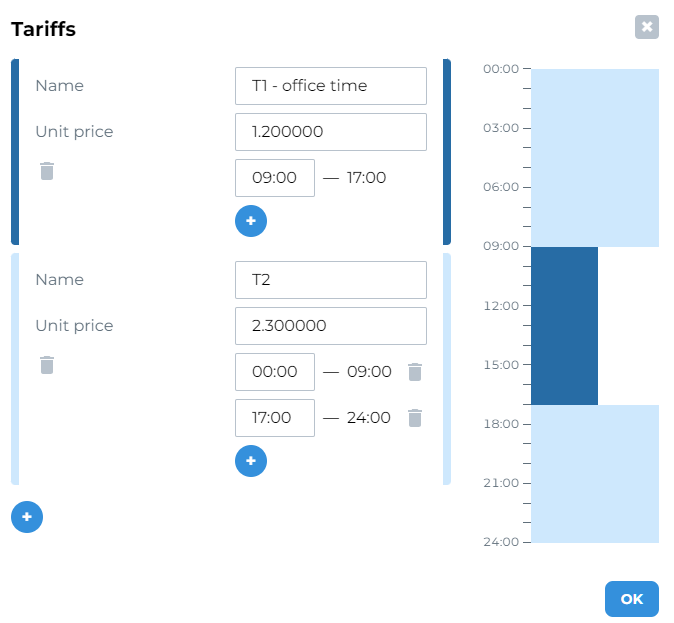
Click on the T1 tariff (dark blue line in the picture) to open the tariff editing window. The window will look like this:
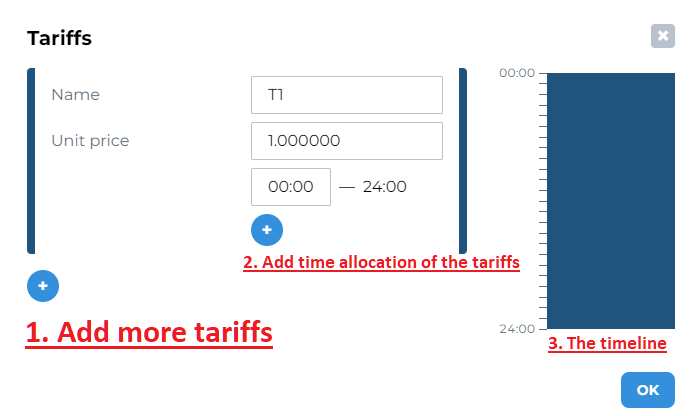
In the editing window, you can:
1. add more tariffs - you can set a new tariff name and unit price.
2. select the time range in which the tariff is active. For example, you can set the T1 tariff to be active only during working hours and the other T2 tariff to be active during the rest.
3. Track the validity of the tariff during the day on the timeline.
The creation of new tariffs and the setting of active hours will be reflected on the timeline on the right hand side. Specific settings could look similar:
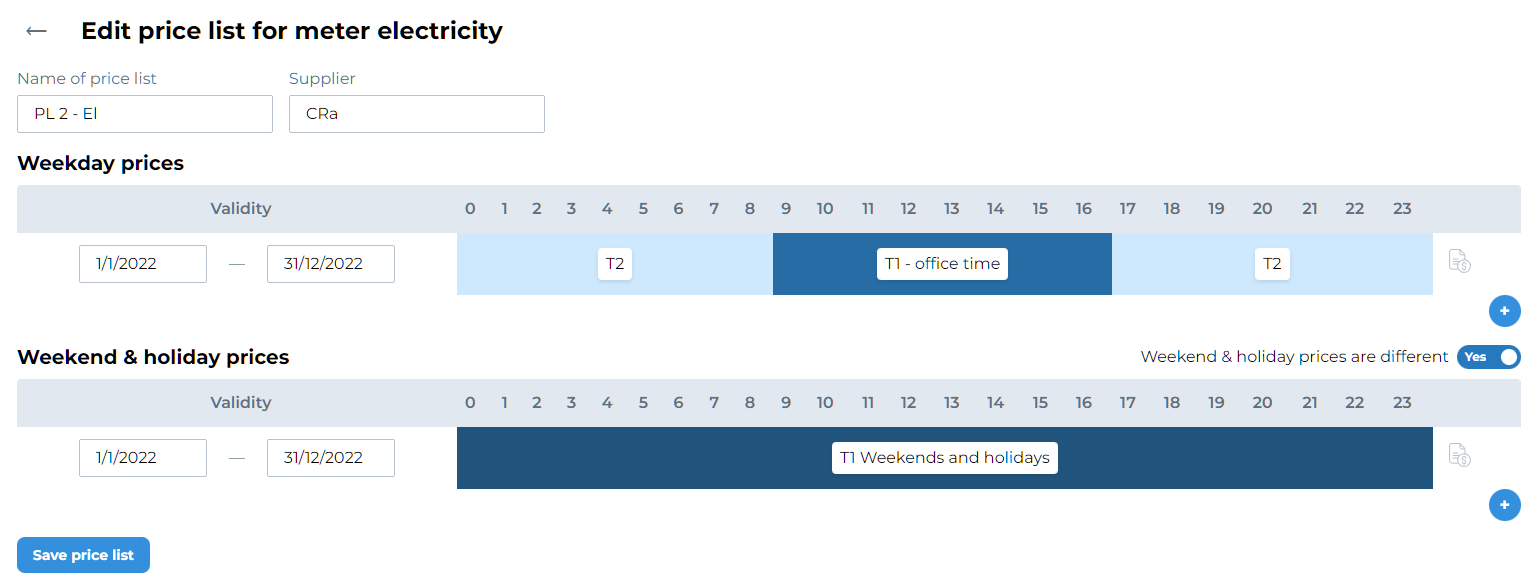
Weekend and holiday prices
You also have the option to add different prices for weekends and holidays. This is done by enabling the toggle on the main page of the specific price list. After that, the process of setting up the tariffs is the same as for regular weekday prices. After enabling this setting, your price list may look like this:
Price list modification
You can edit the price list by clicking on the button with the symbol![]() The procedure is the same as for
creating a new price list, but you start with the preset state from last time.
The procedure is the same as for
creating a new price list, but you start with the preset state from last time.
Price list deleting
You can delete the price list by clicking on the button with the symbol ![]()