Readings exports
Creating a template for export
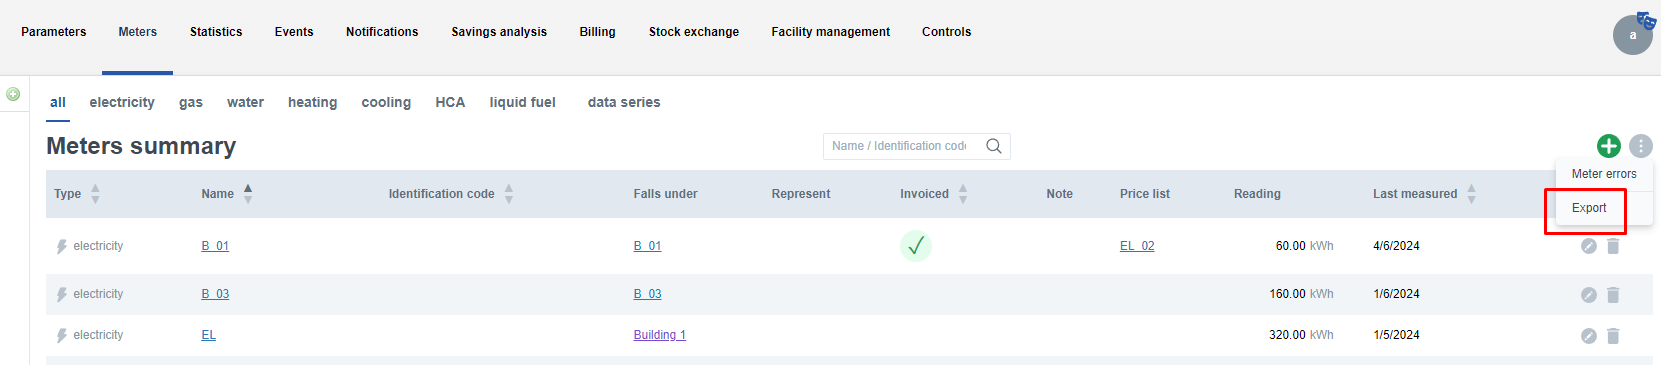
Go to the meters tab, click export in the top right and then click manage templates again in the top right and then click new template.
The first thing you need to do is to click on whether you want to create a template to export readings or consumption/costs.
For the template for export of readings, the template is already partially predefined. You still need to fill in the name of the template at the top left. Then you can choose whether you want to add columns to the export in addition to the reading itself - import ID, energy, object name and others. To add columns, click in the box in the Additional Columns section next to the template name. It is also still possible to click on the arrow next to Measurement/Time in the body of the export to confuse whether we want to sort the readings in descending or ascending order. Then just click on create template at the bottom left.
For the template for consumption or expenses, you can choose the layout of the export table yourself. Clicking on an item and dragging it into the table will add that item as a row/column, depending on where you drag it. On the top right you can set the time. This is just to give you an idea of what the export will look like with this density of readings. The time after which readings are added to the export is then changed when the export is created. Now you just need to name the template and then save it by clicking on create template.
Creating an export
To export the data to excel, go to the meters tab and then click on exports at the top right.
- From the dropdown menu, you can select a template for export. (After selecting a template, you will be given the option to choose whether you want to export once or monthly. One-time export is a single occurrence, while monthly export will be automatically sent to your email every month (the export will be sent as soon as the data from all meters are ready or on the 14th of the month). In the monthly export, the range of exported data is automatically adjusted. Click to select the desired option.
- In the Manage Templates section, you can edit existing templates or create your own.

- Select the range of exported data by clicking in the date field. You can either select one of the preset ranges or choose your own range. When selecting a custom range, you select the start date of the export in the first calendar and the end date in the second calendar.
- Select the energies you want to export by clicking in the square box next to the energy. Selecting an energy to export will automatically mark for export all meters that measure that energy. If you don't want to export all the meters, you can edit the selection by clicking in the box next to the meter you want to exclude/add from the export. Selecting an energy is not mandatory, you can only select the meters you wish to export.
- The last thing to choose is the density of the exported data. Selecting all will add all readings in Enetiva to the export. Alternatively, you can export only the first/last reading of each month/day/hour/15 minutes in the selected export range.
- Then click export to export the entered data. Depending on the selected range and data density it may take some time to export the data, please be patient. Once your data has been exported, you no longer need to wait in the exports tab in Enectiva, but can continue working. Once the export is complete, you will see the message "Export completed." You can download the export in the export history tab, which is located on the export page.
